Discover our Families
Product Gallery
Product Catalogue
Customization
Our Solutions
Solutions Catalogue
Projects
Documentation
Help
Applications
Customization
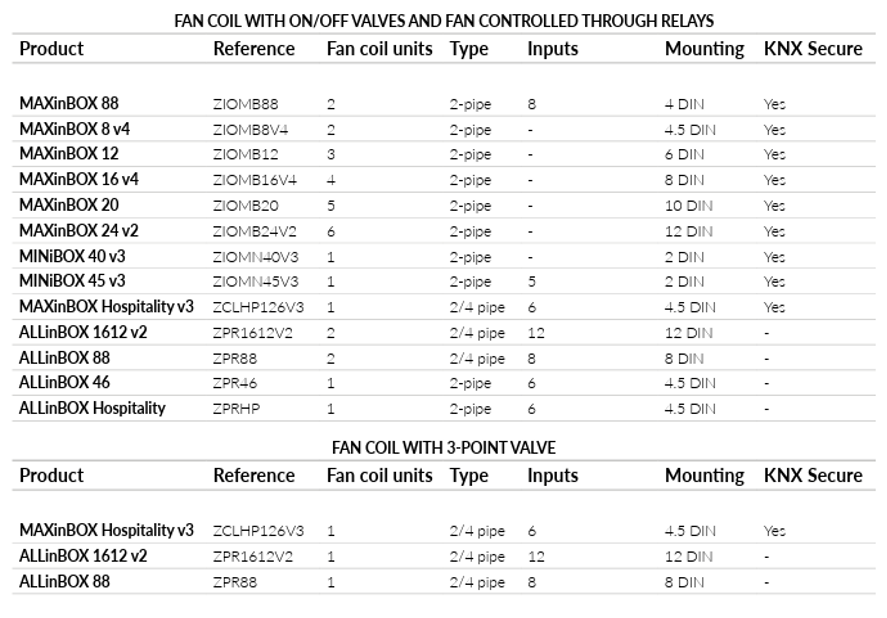
Depending on the number of pipes, thermostat control, type of valve and fan, the following options are available:
A. Valve and fan speed controlled through relays:
B. Valve controlled through 0-10V signal and fan speed activated with relays:
C. Valve controlled by relays and fan speed regulation through 0-10 V signal.
D. Valve or fan speed controlled with 0-10 V signals. Please note: In fan coil systems where one of the control signals is not 0–10 V, an additional actuator is required to control the non-0–10 V element.
Here is a brief summary:
Yes, this combination is possible. You can find an installation diagram below.

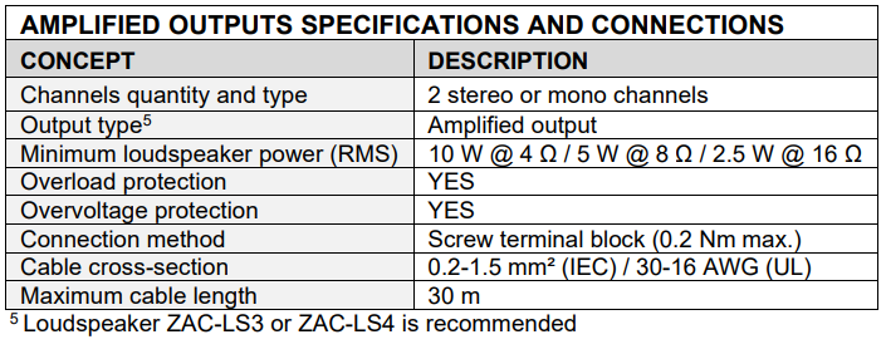
Yes, amplifiers can be connected, as long as they meet all the requirements as the minimum loudspeaker power.
You will need two RF coupler, one for each line. Below you can find a scheme of installation:
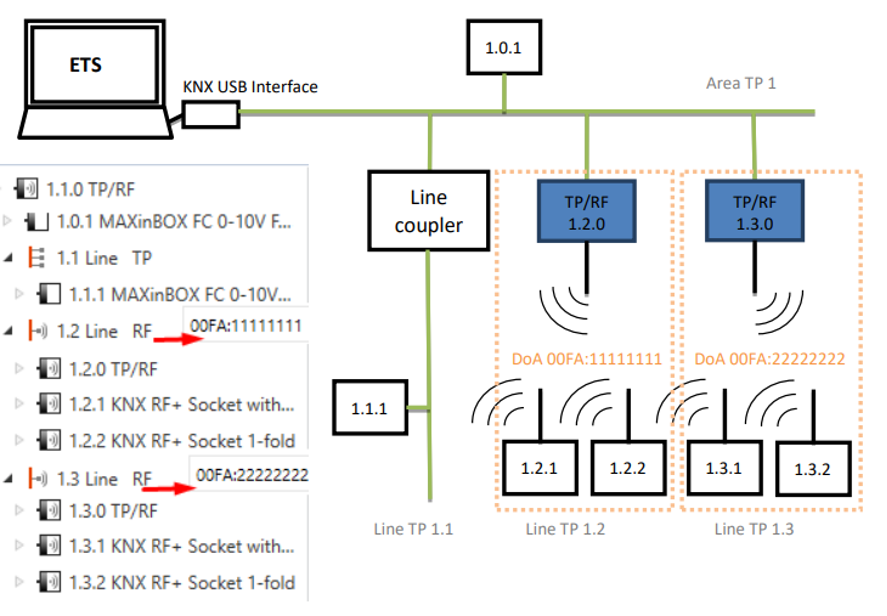
In the configuration, to make use of the RF coupler, you will have to create a new RF line to include the RF coupler and the RF devices to be controlled, it is not possible to mix TP and Rf devices in the same segment. For example, in the previous image, the area has three lines where:
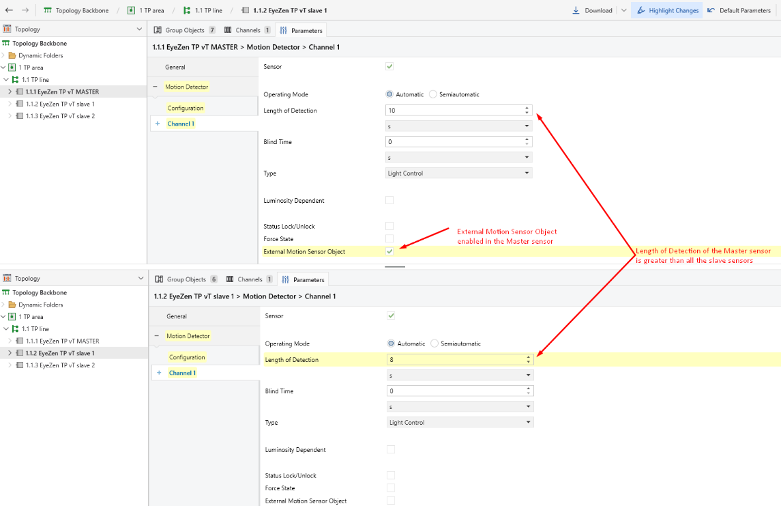
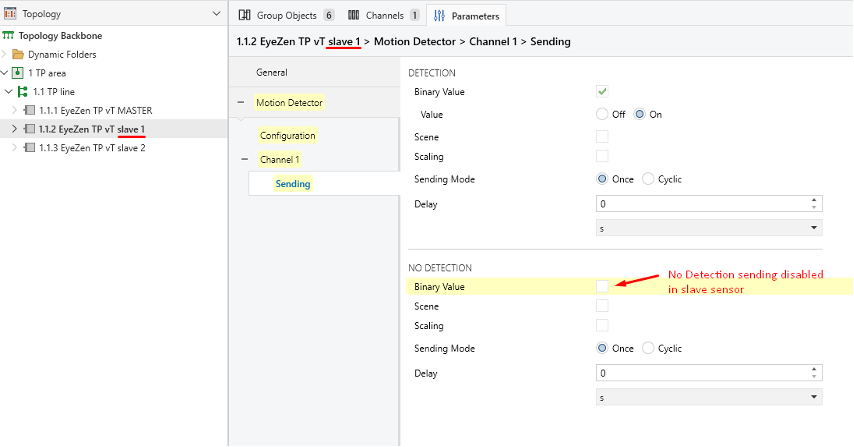
You will need to establish one of your sensors as the master detector and the other one as slave
Then, you need to link the detection output (value 1) objects of all slaves with the External Motion Detection of the sensor you selected as the master.
Also, the Length of Detection time you configure in the master sensor must be greater than the detection lengths of all the slave detectors.
In this way, only the master sensor will transmit the detection and no detection state to the actuators and any other slave sensors will just transmit the detection binary value 1 to the master sensor.
To remotely control a touchscreen, it’s necessary to go through a pairing process between the screen and the smartphone. This process can be done in two ways:
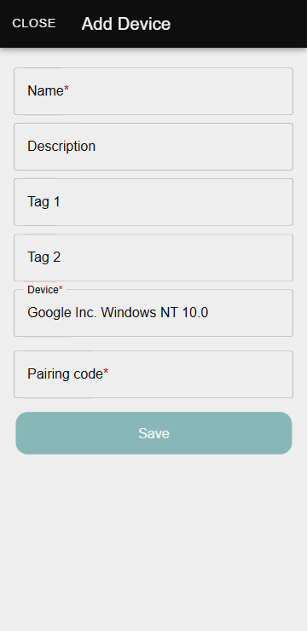
Once the pairing code is introduced, press save, and the touchscreen will synchronize with the Zennio Remote application.
To begin this process, press the button in the bottom right corner of the device list and then press the 3rd one related to local pairing. At this point, the app will automatically begin scanning the local network.
The app will display a list of compatible devices available on the same local network. Next, select the device you want to pair and enter the pairing password. If the password is correct, the device will pair automatically and appear in the device list. Please note if you have not modified the password, it will be the default password of Webserver Tools.
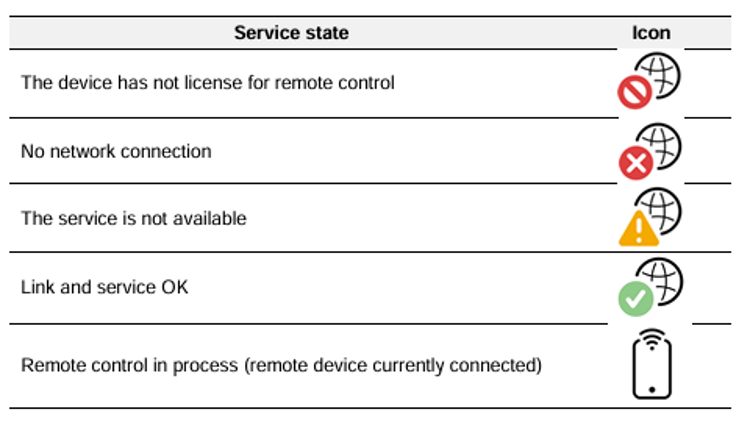
Going through the configuration page on your touchscreen, you can find the pairing box. In one of the corners, there is an indicator with an Earth globe icon, which will be followed by a warning icon in case there is any error in the internet connection or to the server.
The indicators are shown below:
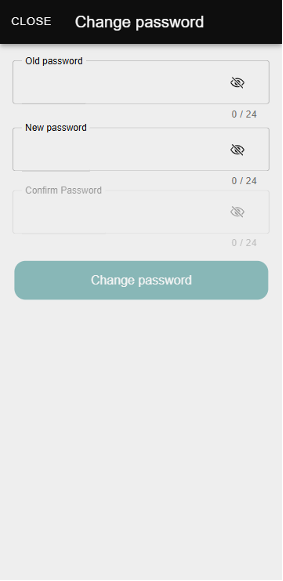
To change the password, follow these steps:
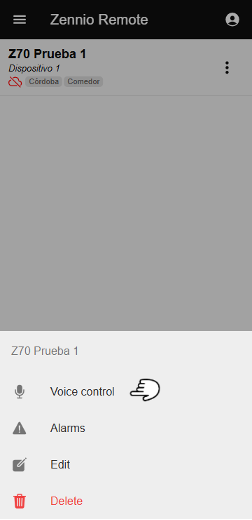
To delete an associated account, access the pairing menu and click and hold the trash icon on the right side. This will remove the pairing with that account.

For more detailed information, please refer to the ZenVoice manual.
If you have any doubts about how to pair your voice assistant with ZenVoice, we suggest you consult our ZenVoice User Guide.